
Figures 1 through 10
Fig. 1 - Fig. 2 - Fig. 3 - Fig. 4 - Fig. 5a - Fig. 5b - Fig. 5c - Fig. 5d - Fig. 6 - Fig. 7 - Fig. 8 - Fig. 9 - Fig. 10


Fig. 5. Seismic images of the Upper Palaeozoic succession in the southern Norwegian
Barents Sea. For location of the sections, see Fig. 2.
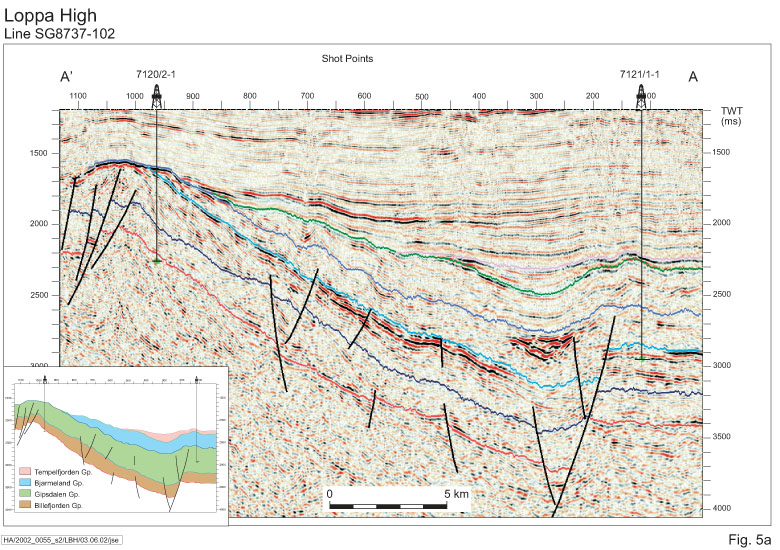
5a: Loppa High from its crest eastwards towards the Bjarmeland Platform, showing fault control on sedimentation and reefoid features in both the Gipsdalen and Bjarmeland groups.
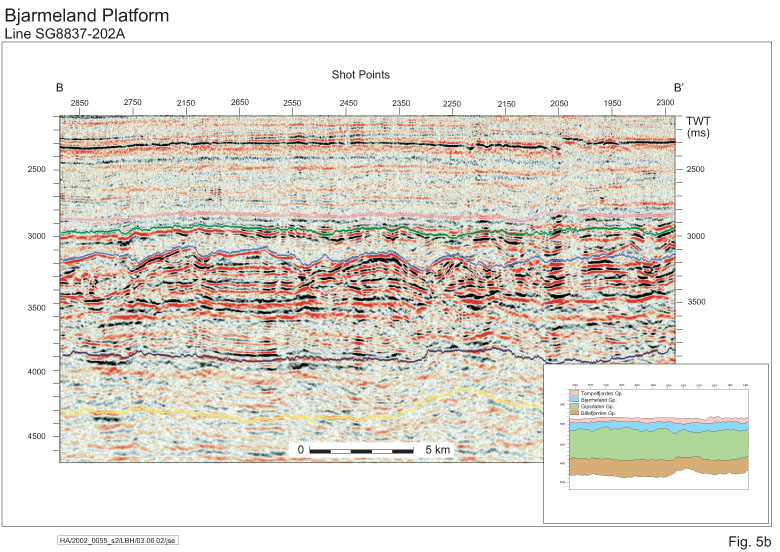
5b: Central Bjarmeland Platform, showing an even development of all 4 major units and the reefoid features typical for the Bjarmeland Group.

5c: Northern Finnmark Platform showing half-grabens controlling the Billefjorden Group’s development and dramatic thickening of the Gipsdalen Group (with reefoid buildups) towards the platform margins.

5d: Finnmark Platform, showing half-graben formation affecting the development of the Billefjorden Group - note the marked thickening northwards on the platform.

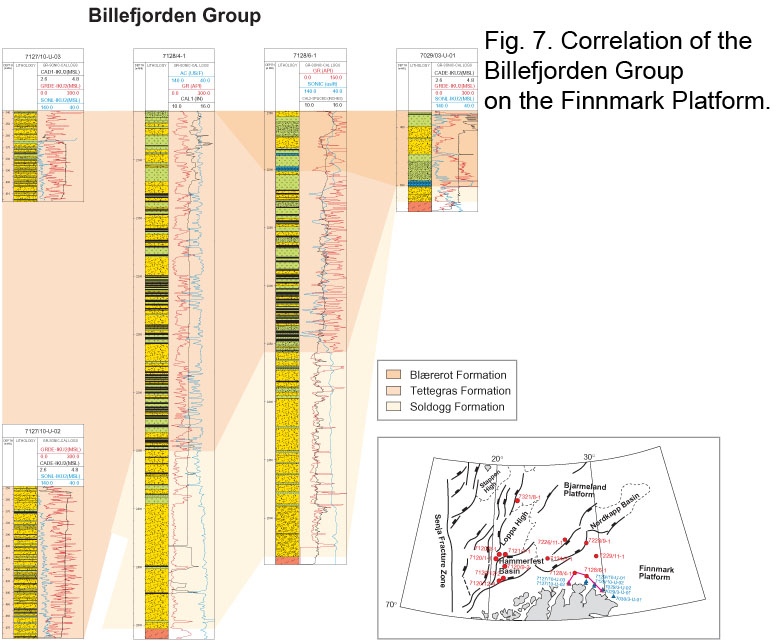
Fig. 8. Well logs of the Billefjorden Group in well 7128/4-1 showing the type section of the Soldogg Formation and the reference section for the Tettegras Formation. For explanation of symbols see Fig. 3.
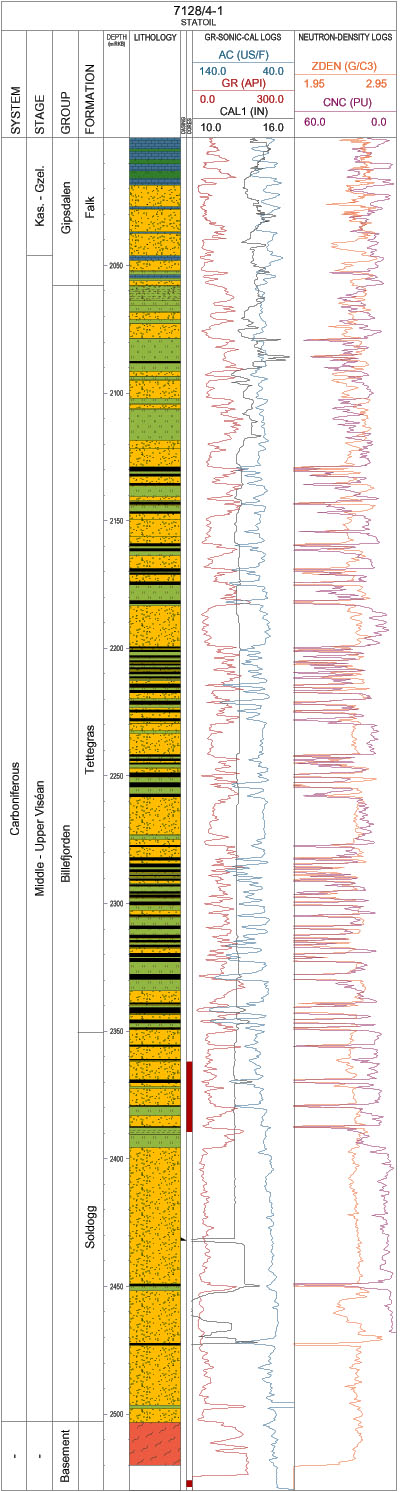
Fig. 9. Well logs of the Billefjorden Group in 7128/6-1 on the Finnmark Platform showing the type section of the Tettegras Formation and reference sections of the Soldogg and Blærerot formations. For explanation of symbols see Fig. 3.
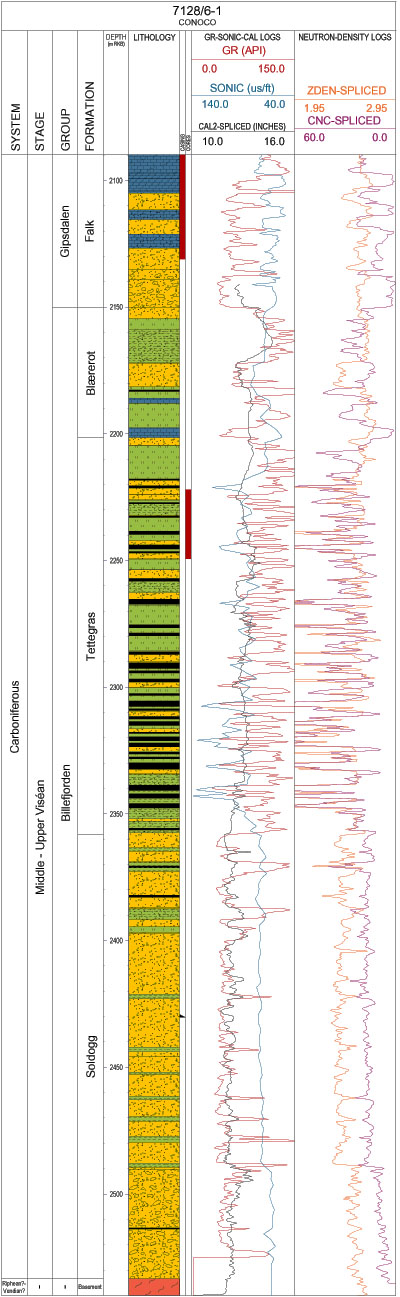
Fig. 10. Well logs of the succession assigned to the Billefjorden
Group in well 7120/2-1 from the Loppa High.

Fig. 1 - Fig. 2 - Fig. 3 - Fig. 4 - Fig. 5a - Fig. 5b - Fig. 5c - Fig. 5d - Fig. 6 - Fig. 7 - Fig. 8 - Fig. 9 - Fig. 10